LazyFoo's SDL2 Tutorials in Rust: A Game Development Journey
Introduction
LazyFoo's SDL2 tutorials have been the go-to resource for learning SDL2 game development for over a decade. Originally written in C++, I decided to port some of these tutorials to Rust using the rust-sdl2 bindings.
This blog documents my porting journey. Whether you're a Rust developer curious about game development or the other way around, this guide will help you understand how 2D games work. We'll cover how characters move, how collisions are detected, how animations work, and more. Each section builds on the previous one, creating a complete picture of 2D game development fundamentals.
Even if you never run a single line of code from this post, you'll walk away with an understanding of how games work under the hood.
Note: This post contains key code snippets to illustrate concepts. For the complete working code, check out the GitHub repository.
Why SDL2 and Not a Game Engine?
I wanted to understand game development at a lower level without using game engines like Bevy or Macroquad. SDL2 provides low-level access to audio, keyboard, mouse, joystick, and graphics hardware through simple APIs abstracting the OS-level details.
Using SDL2 with Rust brings some benefits - memory safety, zero-cost abstractions, and Cargo for easy dependency management. The rust-sdl2 crate provides Rust bindings to SDL2 that feel idiomatic while keeping the performance of the underlying C library.
Setup
To run the code from the GitHub repository, we will need SDL2 installed.
Basic Setup
Install SDL2 on your system by following the instructions in rust-sdl2 documentation
Create a new Rust project and add following dependencies to Cargo.toml:
= { = "0.37.0", = ["image", "ttf", "mixer"] }
The additional features enable support for:
image: Loading PNG, JPG, and other image formatsttf: Rendering TrueType fonts to display textmixer: Playing sound effects and music
If you're on Windows or macOS, make sure to set the LIBRARY_PATH environment variable as described in the rust-sdl2 documentation.
Static Linking (Optional)
For creating standalone executables with bundled dependencies, use this configuration:
[]
= { = "0.37.0", = ["image", "ttf", "mixer", "static-link", "use-vcpkg"] }
[]
= "https://github.com/microsoft/vcpkg"
= "master"
= [
"sdl2",
"sdl2-image[libjpeg-turbo,tiff,libwebp]",
"sdl2-ttf",
"sdl2-mixer[mpg123]",
]
Understanding SDL2's Architecture
SDL2 is organized into subsystems that handle different parts of our game. There are several subsystems available, but we'll mainly use these:
Video Subsystem: Manages windows and rendering. It's our connection to the graphics hardware.
Audio Subsystem: Handles sound playback and mixing audio sources.
Event Subsystem: Manages all user input - keyboard, mouse, window events, and gamepad input.
Timer Subsystem: Provides timing for frame rate control and animations. Games need to know exactly how much time has passed to create smooth motion.
In code, we initialize the main SDL context and then get the subsystems we need:
let sdl_context = init?; // Main SDL context
let video_subsystem = sdl_context.video?; // For graphics
let mut event_pump = sdl_context.event_pump?; // For events
let audio_subsystem = sdl_context.audio?; // For sound
let timer = sdl_context.timer?; // For timing
This modular design lets us initialize only what our game needs. Making a silent game? Skip the audio subsystem. Don't need timers? Leave them out.
What We'll Cover
- Part 1: Foundation
- Part 2: Advanced Rendering
- Part 3: Input and Interaction
- Part 4: Timing and Performance
- Part 5: Movement and Physics
Part 1: Foundation
This section covers the absolute basics — opening a window, displaying images, and handling simple input. These are the building blocks every game needs, whether we are making Pong or an Action-adventure.
01 - Opening a Window
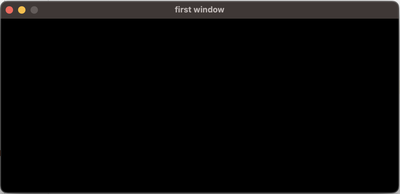
Every game needs a window to draw in. Think of the game window like a blank canvas — before we can paint anything, we need to set up the canvas, prepare our workspace, and decide when we are done painting.
Literally every SDL2 game ever made starts here. From indie platformers to professional game engines, they all start by creating a window.
use Event;
const SCREEN_WIDTH: u32 = 640;
const SCREEN_HEIGHT: u32 = 280;
The sdl2::init() call initializes the entire SDL2 system. Then we get the video subsystem, which gives us connection to the screen.
We use Rust's builder pattern to create our window with a title, size, and centered position. The ? operator handles errors - if something goes wrong, it returns early.
The game loop is the heartbeat of our game. It runs continuously, checking for events like user closing the window. The 'app: label lets us break out of nested loops cleanly. Without this loop, the window will appear and immediately close.
02 - Displaying an Image on Screen with Surfaces
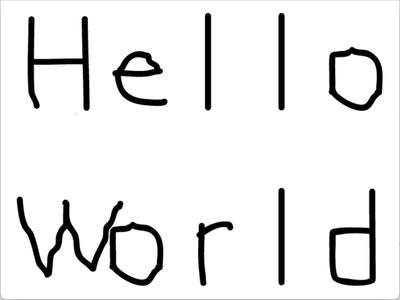
Now let's display an image. A surface is SDL2's way of holding image data in memory. Think of it as a container for pixels.
Surfaces let you modify pixel data directly, which is useful for image editors or level design tools. However, they use CPU rendering instead of GPU, making them slower for games.
let mut canvas = window
.into_canvas
.build
.map_err?;
let surface = load_bmp
.map_err?;
let texture_creator = canvas.texture_creator;
let texture = texture_creator
.create_texture_from_surface
.map_err?;
canvas.copy?;
canvas.present;
We convert our window into a canvas. Think of the canvas as your drawing board where all graphics operations happen.
Then we load a BMP image as a surface, and convert it to a texture. Why the conversion? Textures live in GPU memory and are much faster for rendering. The surface is just a temporary holding area for the image data.
canvas.copy(&texture, None, None)? does the actual drawing. The two None parameters mean "use the entire texture" and "fill the entire canvas."
Finally, canvas.present() makes everything visible. Without this, our drawing stays hidden in a back buffer.
03 - Using Textures for Hardware Acceleration
While surfaces use the CPU to draw, textures use the GPU, which is specifically designed for graphics operations. It's like the difference between drawing by hand versus using a printing press - both work, but one is much faster for repetitive tasks.
This is how all modern 2D games work. Every sprite, background, and UI element we see in games is typically a texture rendered by the GPU.
use LoadTexture;
let texture_creator = canvas.texture_creator;
let texture = texture_creator.load_texture?;
canvas.copy?;
canvas.present;
This is simpler than the previous approach. The LoadTexture trait lets us load images directly as textures, skipping the surface creation step.
04 - Handling Key Presses
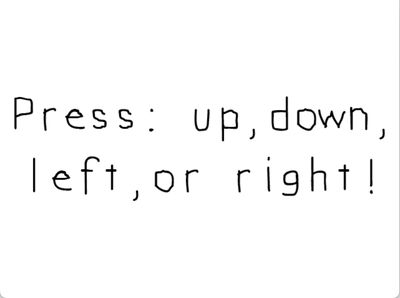
Games are reactive - they wait for something to happen (a key press, mouse click, etc.), then respond accordingly. This is how everything from menu navigation to character movement works.
Think of classic arcade games where pressing different arrow keys changes what happens on screen. We'll load different images and display them based on which arrow key is pressed:
use HashMap;
The KeyPress enum defines different key states. This is more type-safe than using strings.
The HashMap maps each key to its image. Loading all textures upfront is faster than loading them on-demand during gameplay.
// Load all possible images into a HashMap
let media = load_media?;
canvas.copy?;
canvas.present;
'app: loop
The nested match statements handle events. The outer match checks if it's a key press event, the inner match determines which key was pressed. When a valid key is pressed, we look up its texture in the HashMap and render it.
05 - Rendering Geometry Primitives
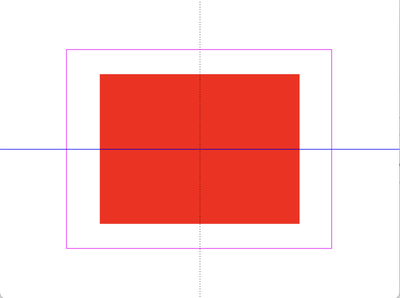
Sometimes we don't need images. Simple shapes work just fine. SDL2 lets us draw basic geometry directly, which is faster than loading textures.
These are used for making games with geometric graphics like Pong. They are also useful for visualizing what's happening in our game during development like debugging collision boxes.
use Color;
use ;
// Clear screen with white
canvas.set_draw_color;
canvas.clear;
// Draw a filled red rectangle
canvas.set_draw_color;
canvas.fill_rect?;
// Draw a blue horizontal line
canvas.set_draw_color;
canvas.draw_rect?;
// Draw a horizontal vertical line
canvas.set_draw_color;
canvas.draw_line?;
// Draw a dotted vertical line
canvas.set_draw_color;
for i in .step_by
canvas.present;
Before drawing anything, we set the color with set_draw_color(). Think of this like dipping your brush in paint and all subsequent drawing operations use this color until we change it.
fill_rect(), draw_rect(), draw_line() are helper functions for drawing geometric shapes. For a dotted line effect, we use draw_point() in a loop, drawing points every 4 pixels.
We draw all these shapes first, then call present() to display everything at once. Drawing order matters here as the later shapes appear on top of earlier ones.
Part 2: Advanced Rendering
Now we're getting into rendering techniques which make games look polished rather than just functional. We will learn about transparency, sprites, animations, and visual effects.
06 - Working with Viewports
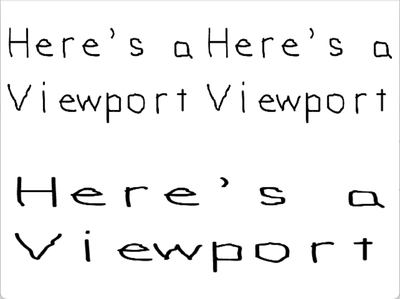
A viewport is like looking through a window. It defines which part of our screen we are currently drawing to. We can set up multiple viewports to show different things at once or create interesting layouts.
Split-screen multiplayer games, mini-maps in strategy games, and picture-in-picture effects all use viewports. They are also useful for UI elements that show different perspectives.
// Top-left viewport - first quarter of the screen
let top_left_viewport = new;
canvas.set_viewport;
canvas.copy?;
// Top-right viewport - second quarter of the screen
let top_right_viewport = new;
canvas.set_viewport;
canvas.copy?;
// Bottom viewport - entire bottom half
let bottom_viewport = new;
canvas.set_viewport;
canvas.copy?;
canvas.present;
set_viewport() limits all drawing operations to a specific rectangle. It is like masking off the rest of the screen.
We load one texture but display it in different viewports. Each viewport shows the same image, scaled to fit its region.
07 - Color Keying for Transparency
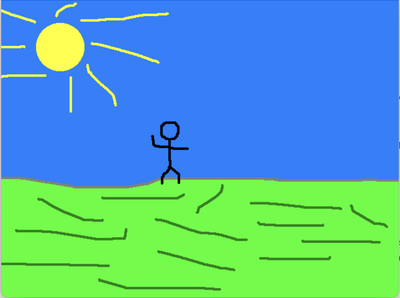
Color keying is a technique which treats a specific color as invisible. It is like green screen technology in movies, anything that is a particular color (usually cyan or magenta) becomes see-through.
Before PNG transparency became a standard, this was how games made transparent backgrounds. Classic 2D sprites still use this technique.
use Surface;
use Color;
The LTexture wrapper stores the texture along with its width and height. This makes it easier to position and render textures without querying dimensions every time.
Notice that we load the image as a surface first, not directly as a texture. This is because we need to access the image at the pixel level to set the color key. After setting which color should be transparent, we convert it to a texture for rendering.
set_color_key() with Color::RGB(0, 0xff, 0xff) (cyan) tells SDL2 to treat all cyan pixels as transparent.
let background_texture = load_from_file?;
let foo_texture = load_from_file?;
// Render background first
background_texture.render?;
// Render character on top - cyan areas will be transparent
foo_texture.render?;
canvas.present;
The limitation is we can only have one transparent color, and we cannot use that color elsewhere in our image.
08 - Sprite Sheets and Clipping
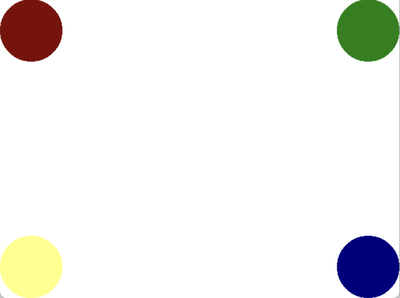
Instead of loading hundreds of individual images, games pack multiple sprites into one texture. This is more efficient and faster to load.
A sprite sheet is like a comic strip with multiple frames in one image. Clip rectangles are used to specify which portion of the image to show.
// Define rectangles for each 100x100 sprite in the sheet
Our sprite sheet has four 100×100 pixel sprites arranged in a 2×2 grid. We create a rectangle for each sprite to mark its position in the sheet.
let = load_media?;
canvas.set_draw_color;
canvas.clear;
// Render each sprite in a different corner
sprite_texture.render?;
sprite_texture.render?;
sprite_texture.render?;
sprite_texture.render?;
canvas.present;
We load one texture and render different parts of it by passing different clip rectangles. Each call shows a different sprite at a different position on screen.
09 - Color Modulation
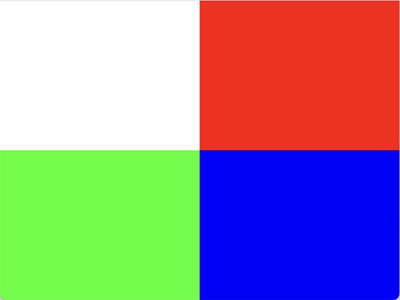
Color modulation multiplies each pixel's RGB values by a factor. This is used to recolor something without creating multiple versions of the same sprite. It doesn't change what's there but just how much of each color shows through.
Damage flashes (turning characters red when hit), power-up effects (making characters glow), day/night cycles (tinting everything blue at night) or UI themes, all use this.
set_color_mod() sets multiplication factors for each color channel. 255 means full color (multiply by 1.0), 0 means no color (multiply by 0), and 128 is half intensity.
let mut texture = load_from_file?;
let mut red_tint: u8 = 255;
let mut green_tint: u8 = 255;
let mut blue_tint: u8 = 255;
'app: loop
The keyboard controls let you adjust each channel. The math is simple: for each pixel, new_red = original_red * (red_tint / 255). This happens at the GPU level, so it's fast.
10 - Alpha Blending
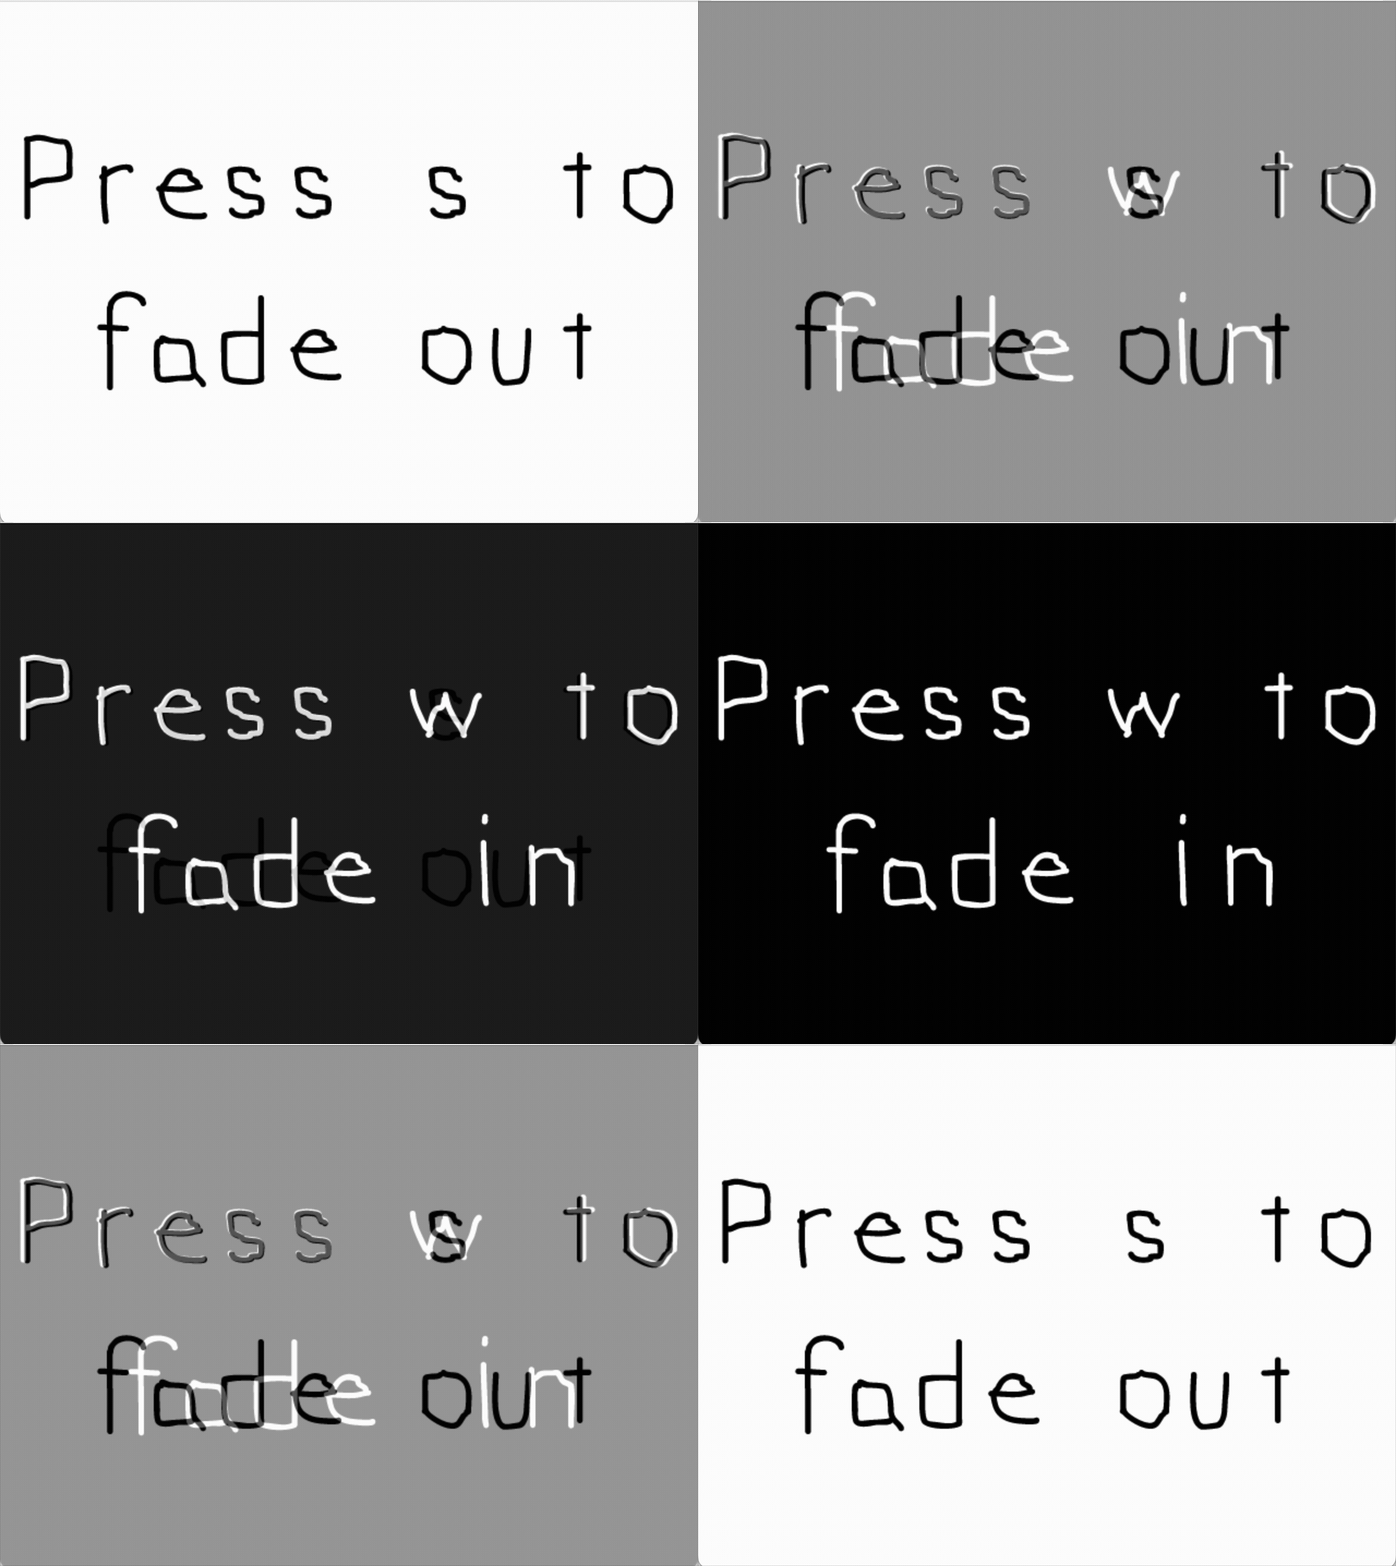
Unlike color keying which is all-or-nothing transparency, alpha blending gives us smooth gradients from fully opaque to fully transparent.
Fade-in and fade-out effects, ghost enemies, UI overlays, particle effects (smoke, fire), all use alpha blending.
set_alpha_mod() controls transparency. At 255, the texture is fully opaque. At 0, it's invisible. Values in between create partial transparency.
let mut modulated_texture = load_from_file?;
let background_texture = load_from_file?;
let mut alpha: u8 = 255;
'app: loop
We render the background first, then the modulated texture on top. The alpha value determines how much the background shows through.
11 - Animated Sprites
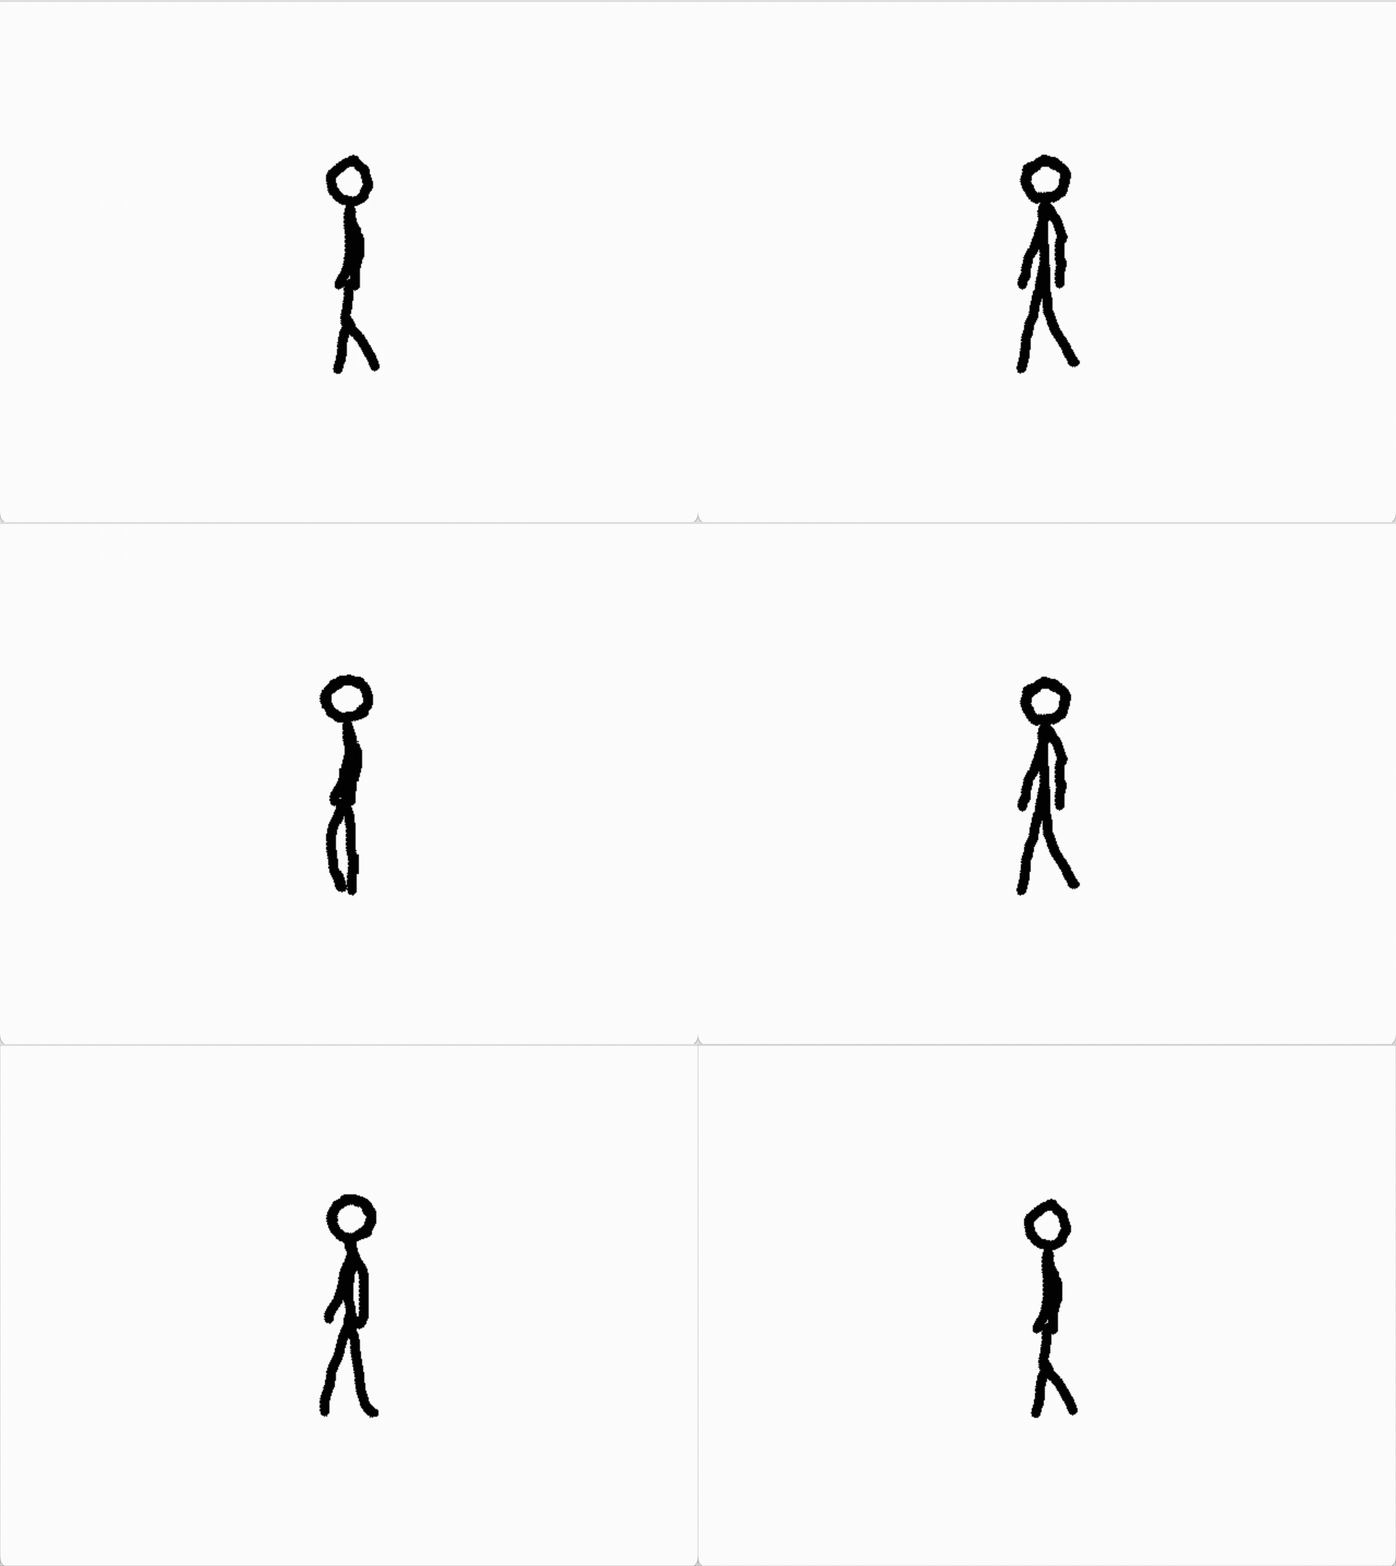
Animation is just rapidly showing a sequence of slightly different images. By cycling through frames of a sprite sheet fast enough, we create the illusion of motion. Mario running, enemies walking, coins spinning, or fires burning, all use sprite animation which brings games to life.
let = load_media?;
let mut frame: usize = 0;
'app: loop
The frame counter tracks which animation frame we are on. The modulo (frame % 4) cycles through frames 0-3 repeatedly. We select the clip rectangle for the current frame, render it, then sleep for 100ms.
The sleep() here controls animation speed. 100ms per frame gives us 10 FPS. Real games use delta time (the time elapsed since the last frame) to make animations smooth and frame rate independent.
12 - Rotation and Flipping
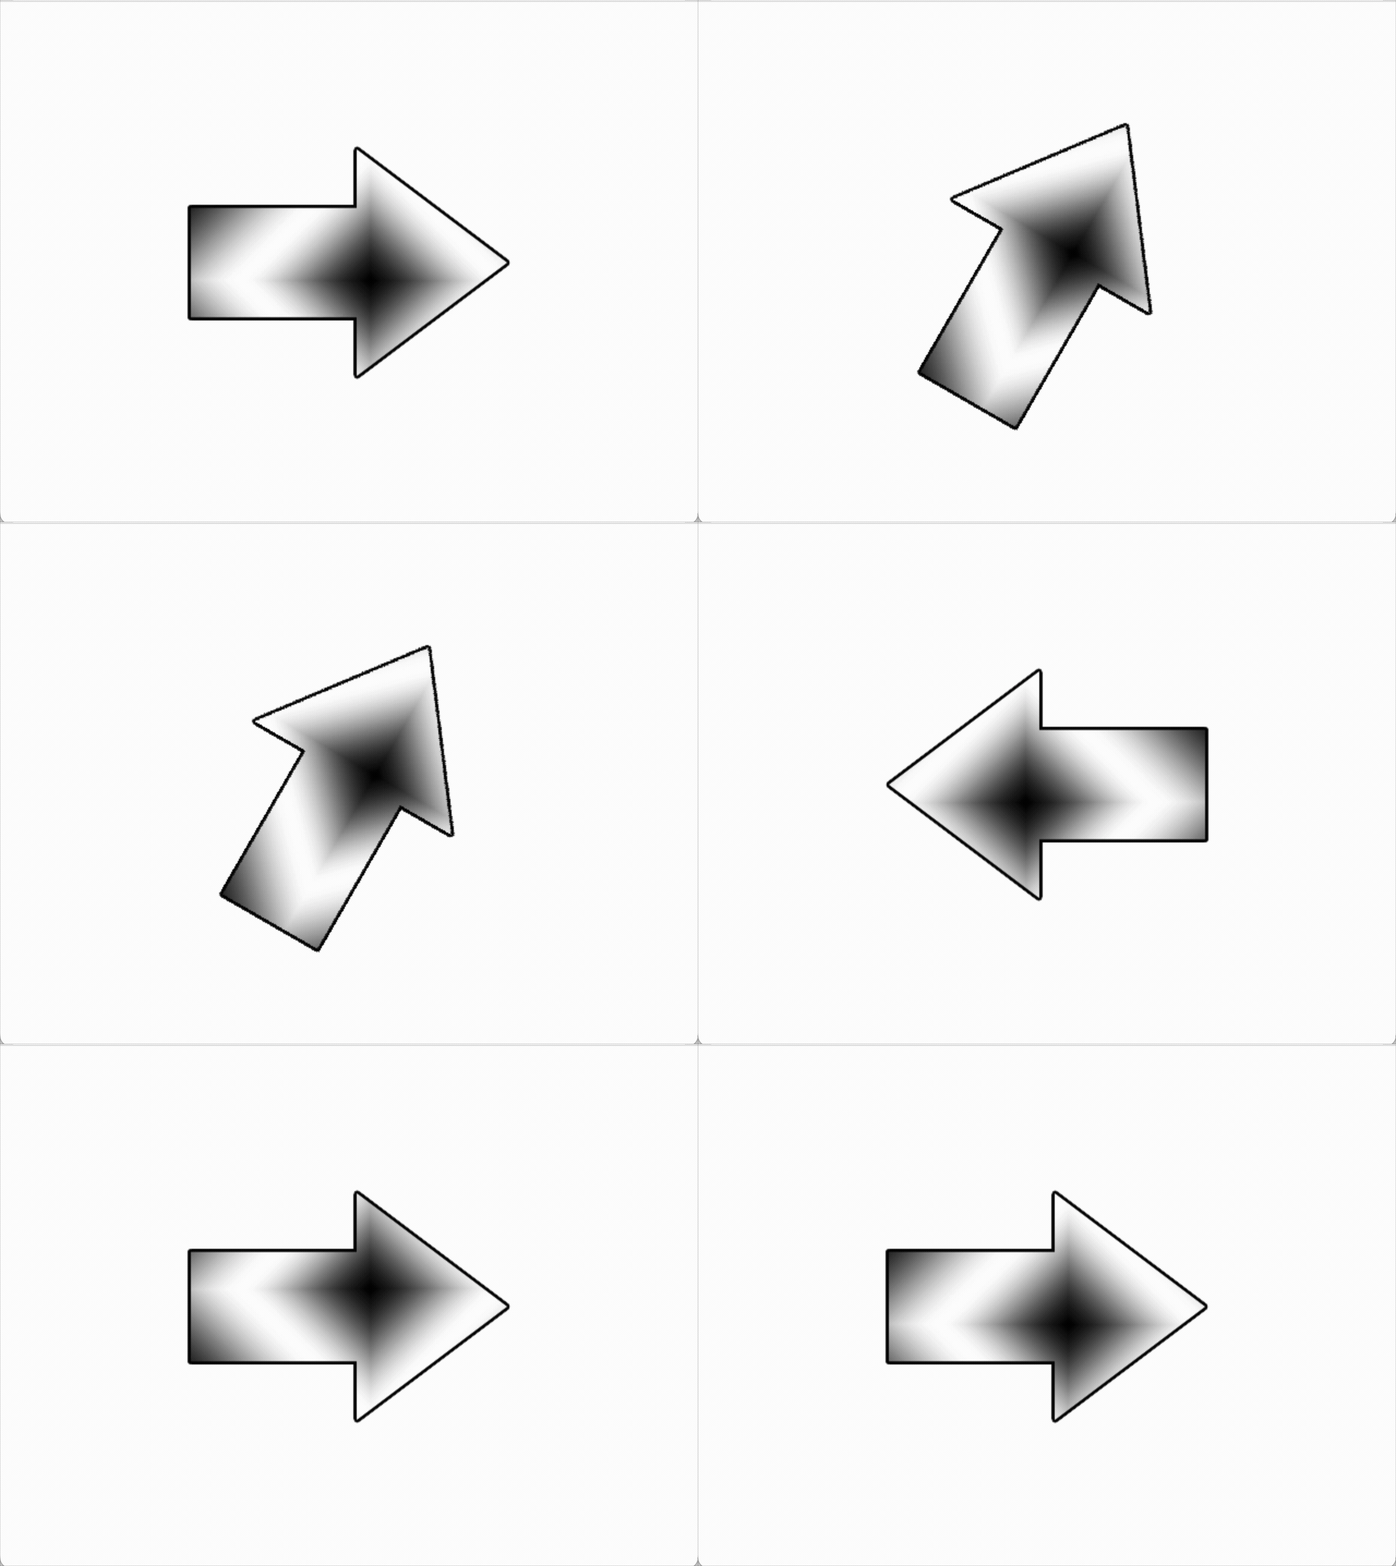
Instead of creating separate images for every angle or direction, we can transform a single image. Rotation spins it around a point, and flipping mirrors it horizontally or vertically.
Rotating arrows, spinning items, characters that face left or right using the same sprite, all use this. It saves memory by reusing the same image in multiple orientations.
The render function now supports rotation and flipping.
let arrow = load_from_file?;
let mut degrees: f64 = 0.0;
let mut flip_vertical: bool = false;
let mut flip_horizontal: bool = false;
'app: loop
copy_ex() supports transformations. The rotation parameter is an angle in degrees (clockwise), and center parameter specifies the rotation point (None means center). The flip flags mirror the image horizontally or vertically.
13 - Rendering Text
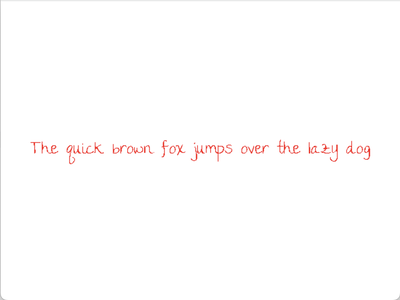
Text is everywhere in games: menus, dialogue, scores, health numbers, instructions. SDL2_ttf extension lets us render text using TrueType fonts.
RPG dialogue systems, platformer score counters, strategy game resource displays, all render text dynamically based on game state.
The ttf_context initializes the font rendering system. We load a TrueType font at a specific point size. The render() method creates a surface with the text, and solid() renders it quickly (use blended() for smooth anti-aliased text).
Just like images, we convert the text surface to a texture for GPU accelerated rendering.
let ttf_context = init.map_err?;
let text = load_media?;
canvas.clear;
text.render?;
canvas.present;
We can cache textures for static text or regenerate them when text changes like a score counter.
Part 3: Input and Interaction
Games need to respond to player input. In this section, we will cover keyboard and mouse input handling. There are other input methods like joysticks and gamepads, but we will focus on these two for now.
14 - Mouse Events
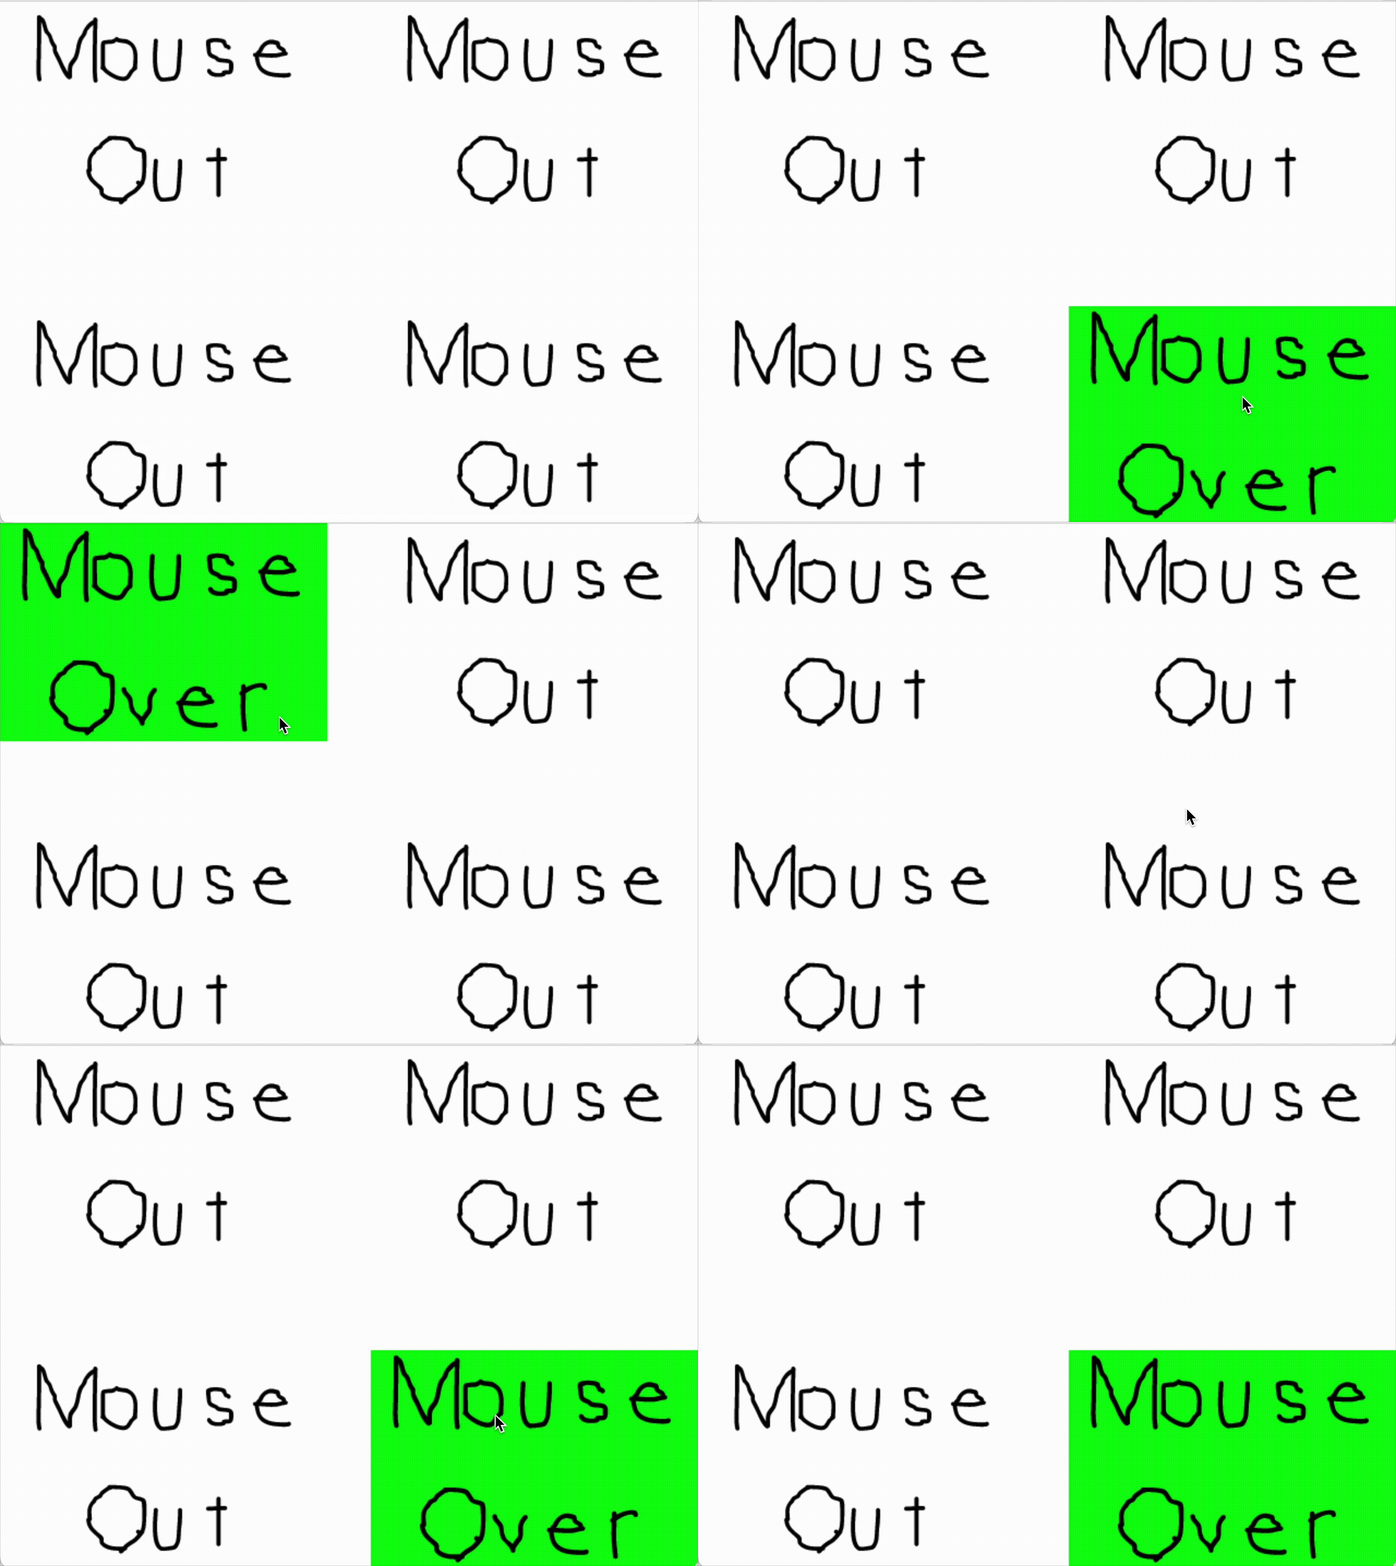
Buttons, clickable UI elements, and drag-and-drop interfaces, all rely on mouse interaction. We track button states (hover, pressed, released) and mouse positions to create responsive elements.
const TOTAL_BUTTONS: u32 = 4;
const BUTTON_WIDTH: u32 = 300;
const BUTTON_HEIGHT: u32 = 200;
let = load_media?;
let mut buttons = initialize_buttons;
let mut event_pump = sdl_context.event_pump?;
'app: loop
The button structure tracks the button's position and current visual state (Mouse Over or Mouse Out). The handle_event method checks if the mouse is inside the button's bounds using simple coordinate math.
Based on whether the mouse is inside and whether it's clicked, we update the button's sprite. This creates that satisfying visual feedback when you hover over or click buttons, the same technique used in every game menu we have ever seen.
15 - Key States
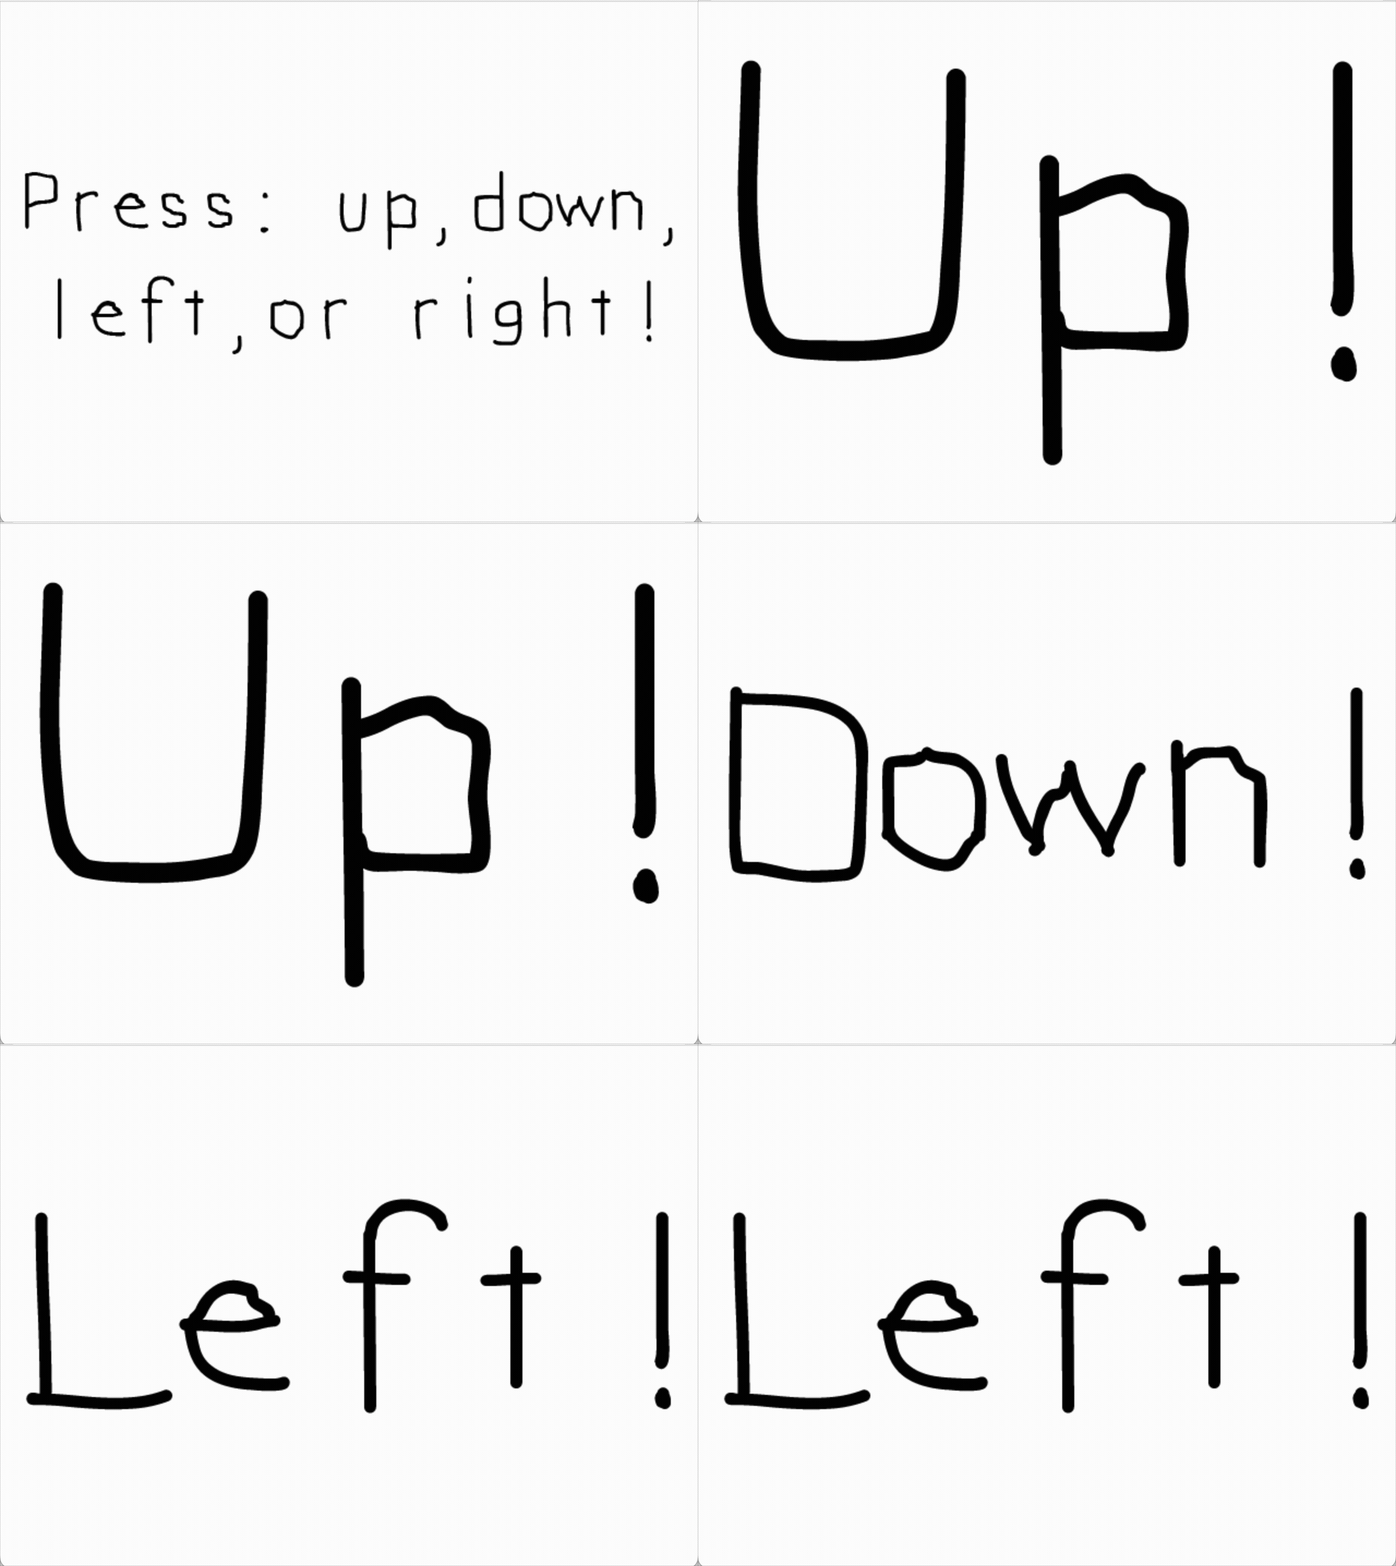
Instead of reacting to individual key press events, sometimes we need to check if a key is currently held down. This is crucial for movement controls where holding an arrow key should continuously move the character.
Fighting games checking if we are holding the block button, racing games checking if we are holding the accelerator, or any game where we hold a key for continuous action, all use key state checking.
let sprites = load_media?;
let mut current_image: &str = "press";
let mut event_pump = sdl_context.event_pump?;
'app: loop
The keyboard_state() gives us a snapshot of all keys at this moment. We can check if multiple keys are pressed at once, which is useful for games where we might be moving diagonally (up + right) or performing complex input combinations.
This is different from event-based input. Events fire once when we press or release a key. State checking tells us if a key is down right now. Use events for one-time actions like jumping, and state checking for continuous actions like walking.
16 - Sound Effects and Music
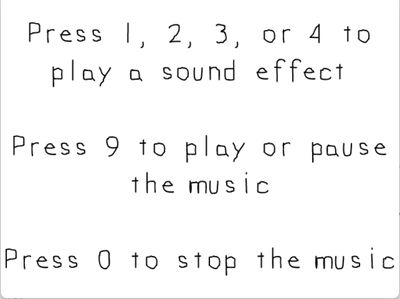
Sound brings games to life. Background music sets the mood, and sound effects provide feedback for actions. SDL2_mixer handles both short sound effects and long background music efficiently.
The "coin collect" sound in platformers, "pew pew" sound in shooters, background tracks in RPGs, all use SDL2_mixer. The mixer can play multiple sounds simultaneously and loop music seamlessly.
open_audio?;
let music_media = load_media?;
let channel = all;
'app: loop
The audio system is initialized with 44.1kHz sample rate (CD quality), stereo output, and a 2048 byte buffer size.
Music is for long tracks. It streams from disk to save memory. Chunk is for short sound effects loaded into memory for instant playback. The second parameter in play() is the loop count: 0 plays once, -1 loops forever.
Part 4: Timing and Performance
Games need precise timing to run smoothly. In this section, we will cover measuring time, controlling frame rates, and ensuring our game runs consistently across different hardware.
17 - Basic Timer
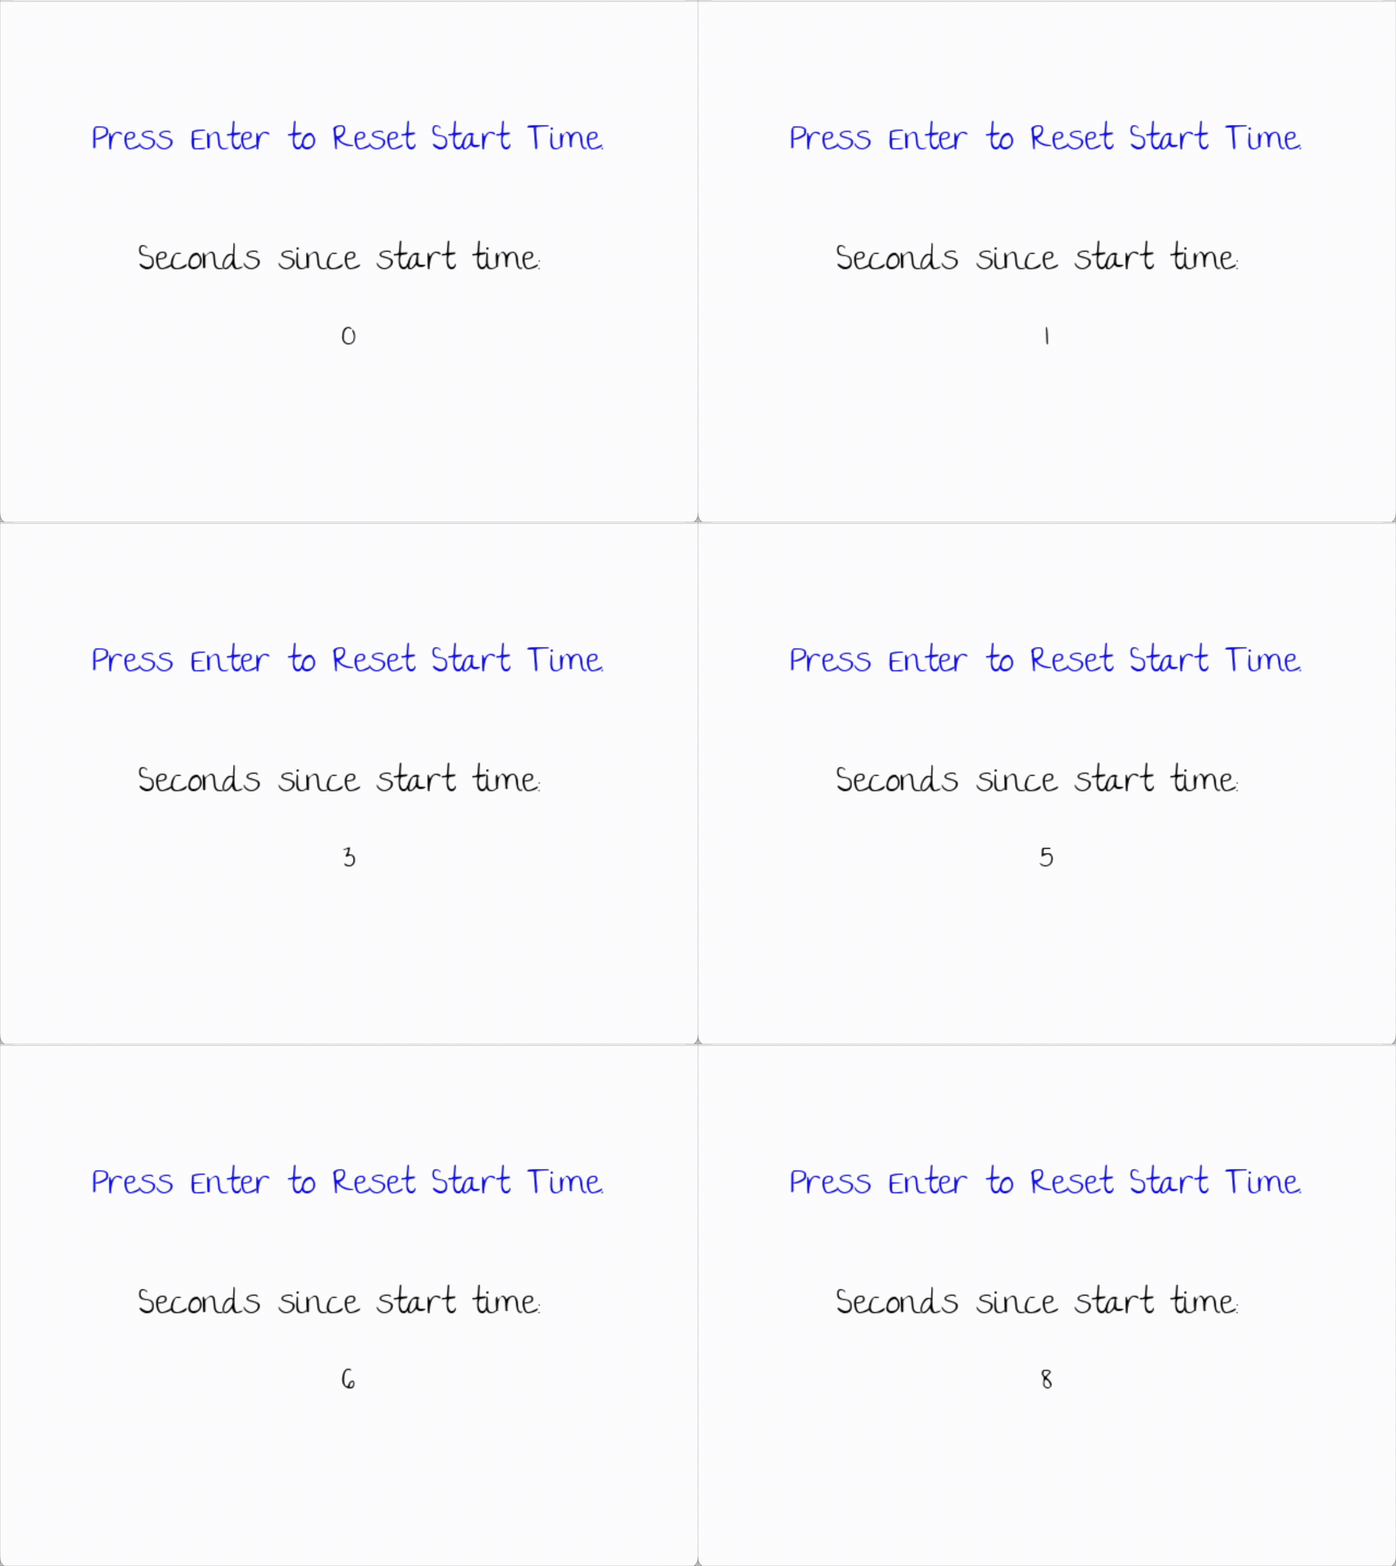
Timers are the backbone of game timing. We need to know how much time has passed to create time-based events, animations that play at the right speed, or cooldowns for abilities.
Any game with timed events like power-ups that last 10 seconds, enemies that spawn every 5 seconds, or animations that play for 2 seconds, all use timers.
let mut start_time = 0;
let timer = sdl_context.timer?;
let time_texture = load_from_rendered_text?;
canvas.set_draw_color;
canvas.clear;
time_texture.render?;
canvas.present;
The timer.ticks() returns milliseconds since SDL initialization. It's a simple monotonically increasing counter, perfect for measuring elapsed time.
18 - Advanced Timer
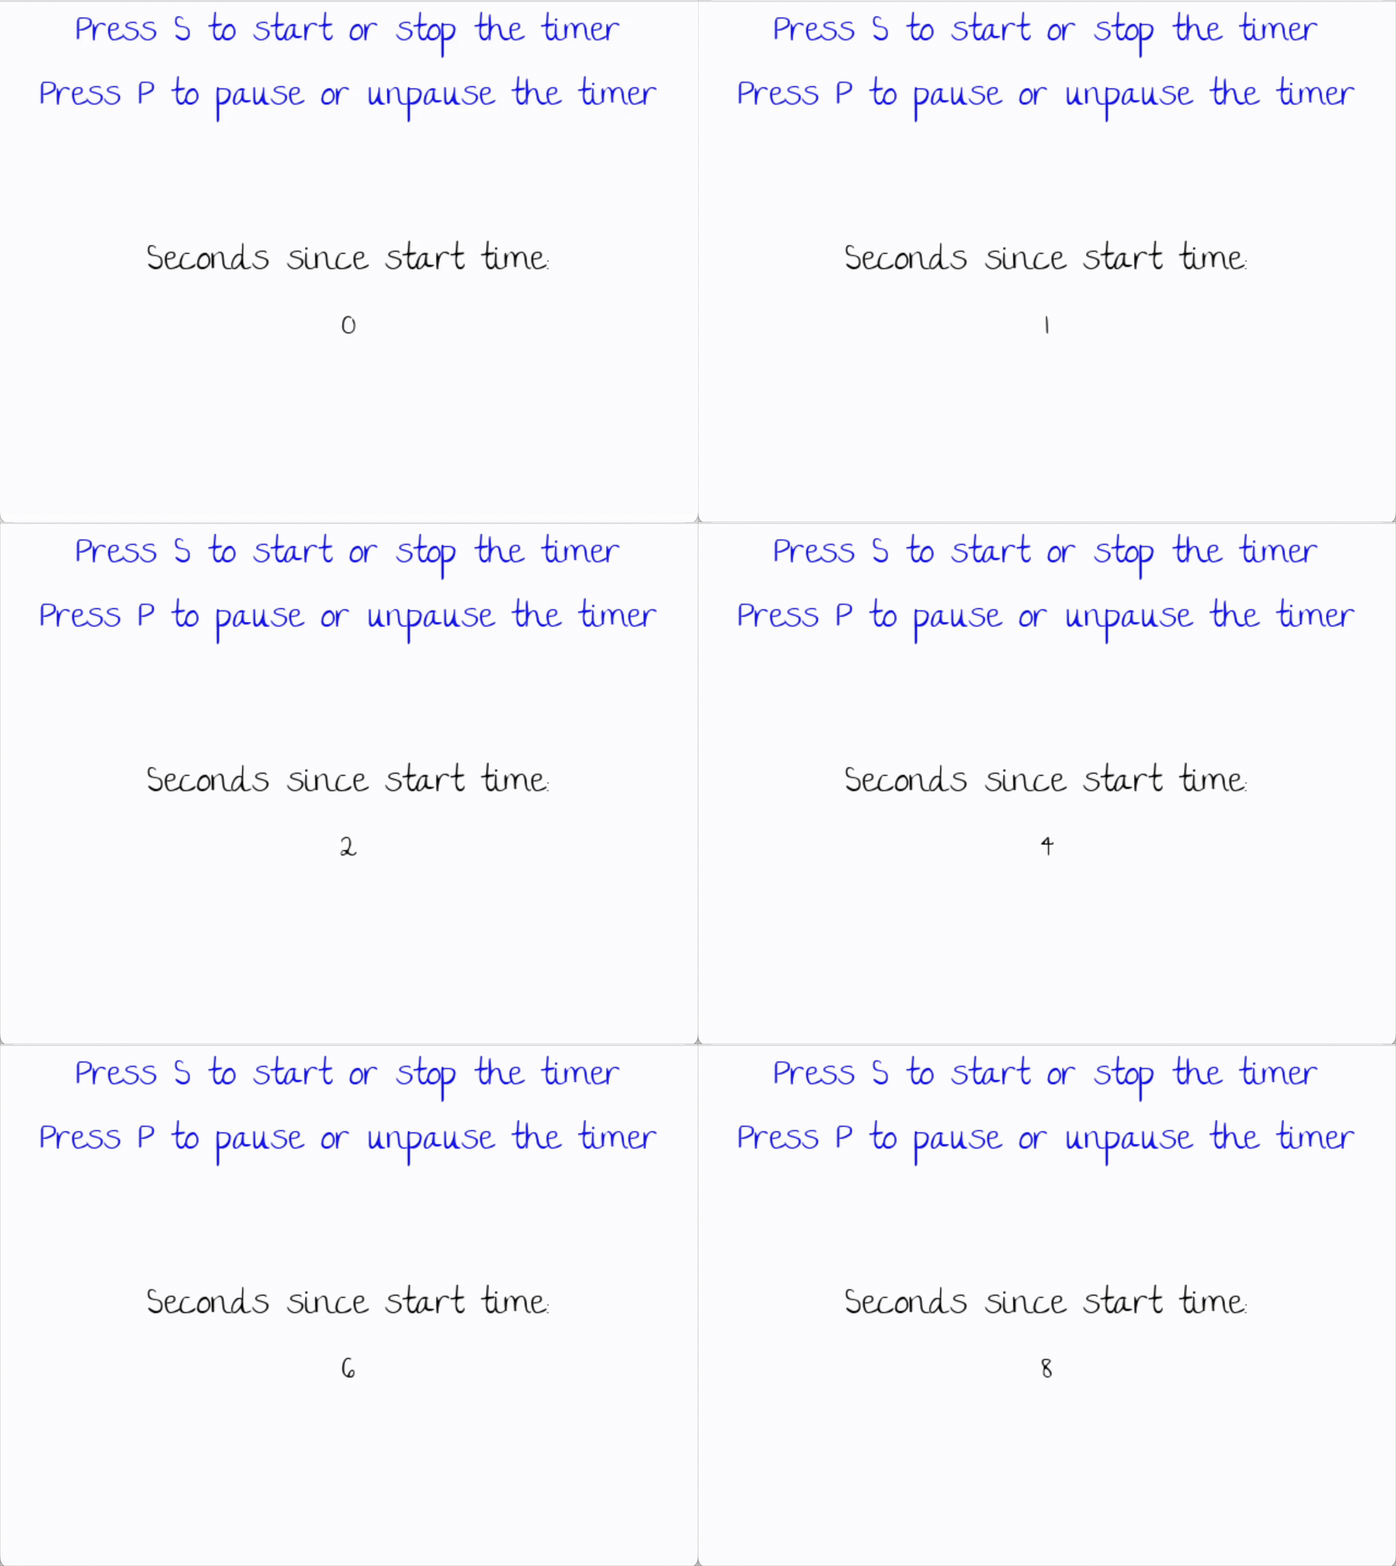
A timer that's actually useful needs more than just tracking time. It needs start, stop, pause, and unpause. Think about when we pause a game. The timer should freeze, then pick up right where it left off when we unpause.
Pause features, racing lap timers, speedrun counters, these all need start/stop/pause/unpause functionality.
Our timer tracks four things: started state, paused state, start time, and paused duration. When paused, we save elapsed time.
When unpaused, we adjust the start time to exclude the pause. This way, when we call get_ticks(), it gives us the actual running time without counting the paused time.
19 - Calculating Frame Rate
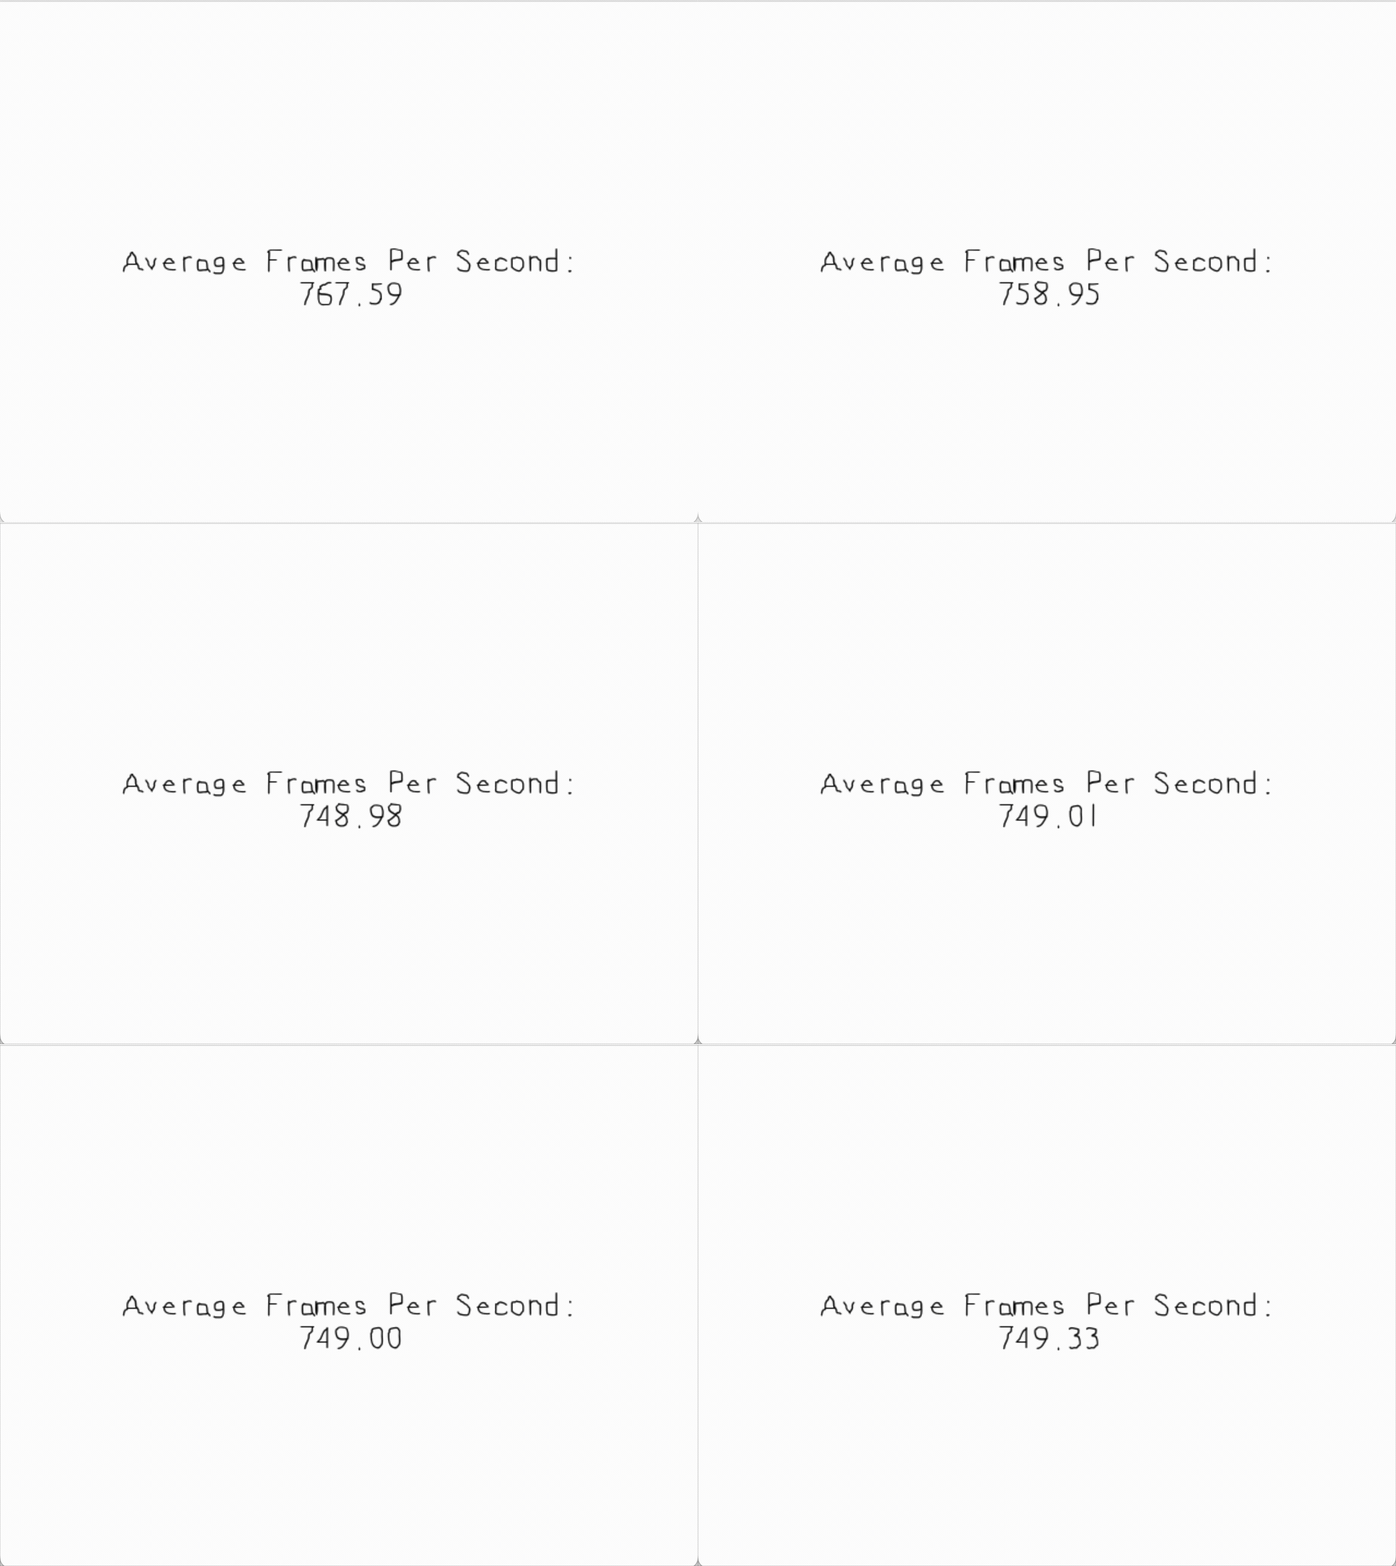
Frame rate tells us how smoothly our game is running. 60 FPS means the game updates 60 times per second, which feels smooth and responsive. Below 30 FPS, players start noticing stuttering.
FPS counters in debug modes use this technique to measure performance.
//The frames per second timer
let mut fps_timer = new;
//Start counting frames per second
let mut counted_frames = 0;
fps_timer.start;
let mut event_pump = sdl_context.event_pump?;
'app: loop
We count how many frames we have rendered and divide by how many seconds have passed to get frames per second. This gives us the average FPS over the entire run.
For a more responsive FPS counter, we could calculate FPS each second by resetting the counter every 1000ms, or use a rolling average of the last few frames. But this simple approach works great for monitoring overall performance.
20 - Capping Frame Rate
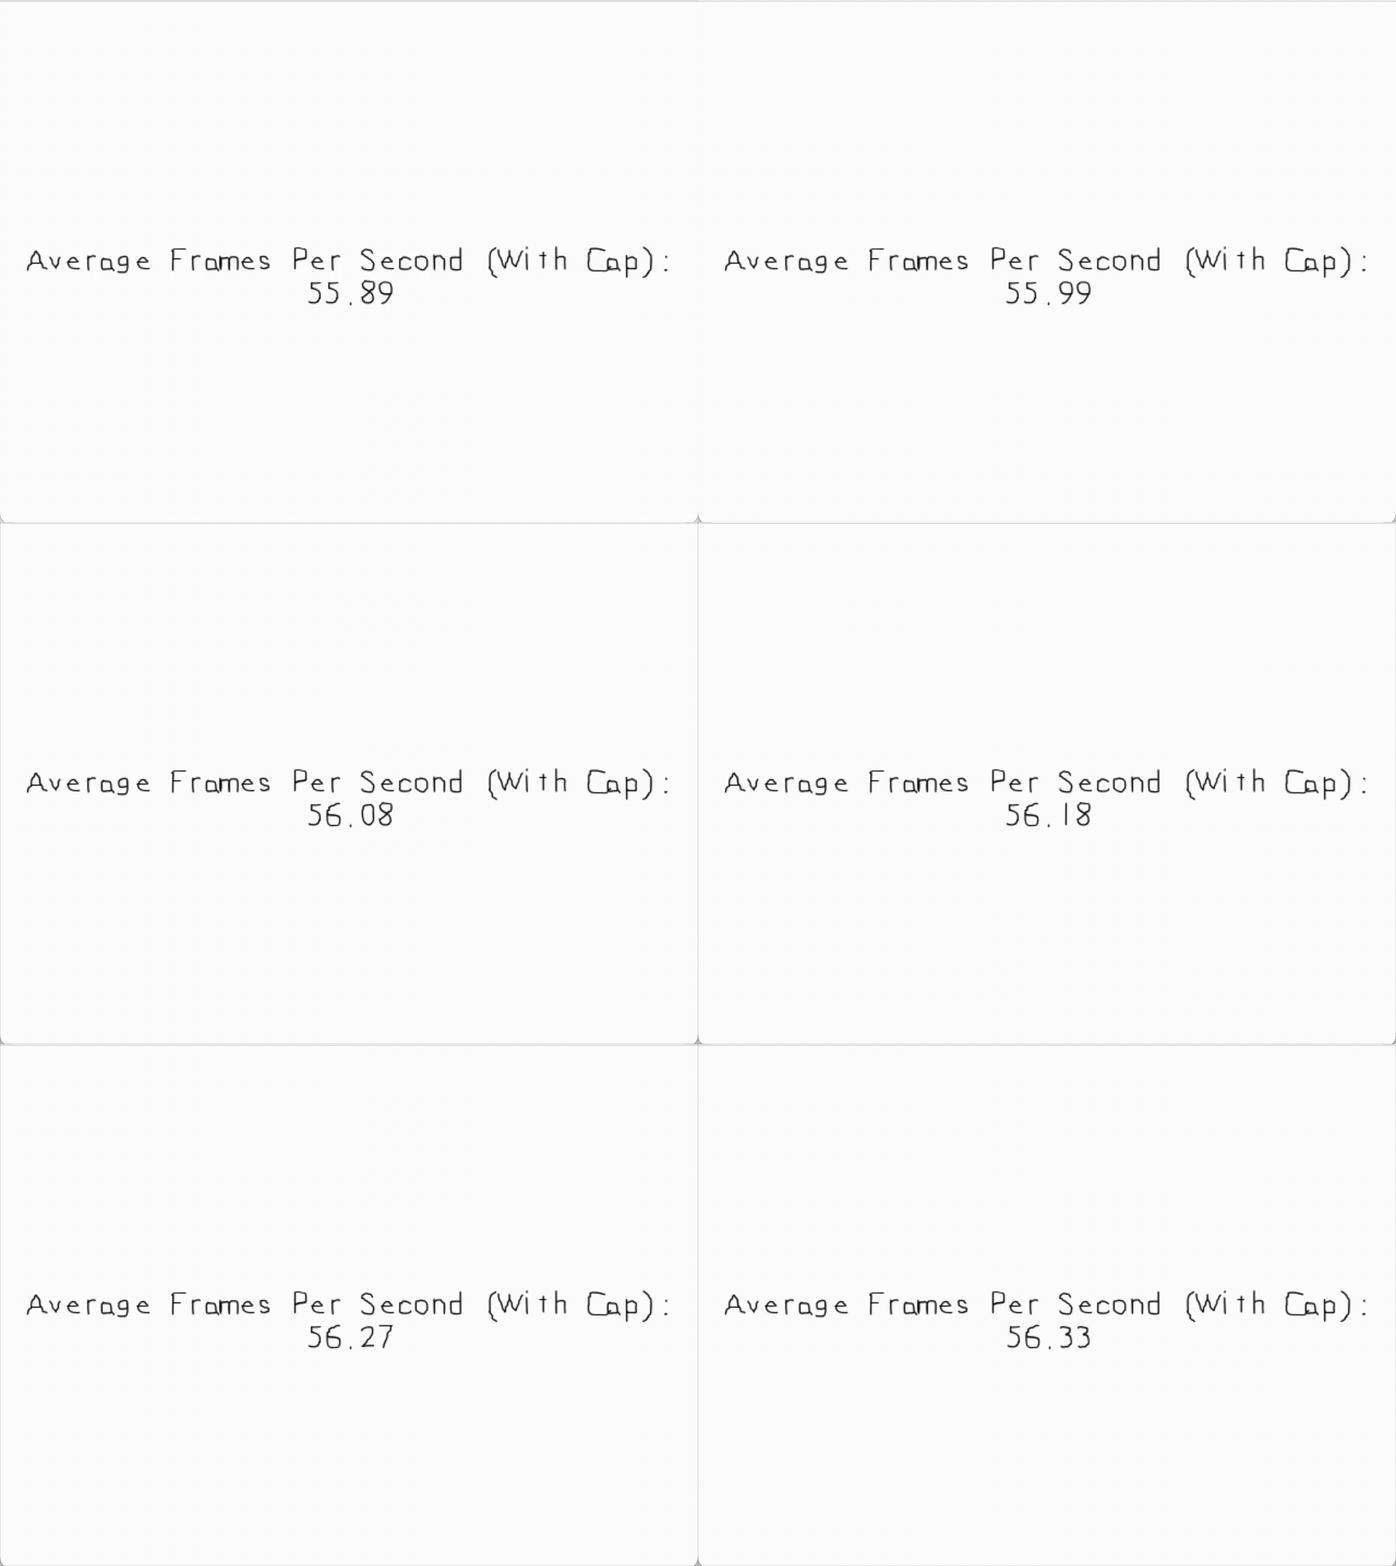
Without frame rate capping, our game runs as fast as possible, potentially thousands of FPS. This wastes CPU and makes gameplay inconsistent. Capping ensures smooth, predictable gameplay and prevents unnecessary energy consumption.
Commercial games typically cap frame rate at 30, 60, 120, or 144 FPS depending on the target platform. It makes physics consistent and prevents the game from consuming unnecessary resources.
const SCREEN_FPS: f32 = 60.0;
const SCREEN_TICKS_PER_FRAME: f32 = 1000.0 / SCREEN_FPS;
//The frames per second timer
let mut fps_timer = new;
//The frames per second cap timer
let mut cap_timer = new;
fps_timer.start;
loop
We calculate how long each frame should take (16.67ms for 60 FPS), then measure how long the frame actually took. If we finished early, we sleep for the remaining time. This ensures each frame takes exactly the target duration.
This is a simple but effective frame rate limiter. More advanced games might use VSync or more sophisticated timing systems, but this approach works perfectly for most 2D games.
Part 5: Movement and Physics
Games need objects that move and interact. In this section, we will cover making things move realistically and detecting when they collide.
21 - Motion

Movement is about updating position based on velocity. Velocity changes based on acceleration (like gravity or player input), and position changes based on velocity. This creates smooth, natural feeling motion.
Characters that walk, jump, or fall use this. Platformers like Mario, shooters where we walk around, racing games, all are built on this foundation.
When a key is pressed, we change velocity. When released, we change it back. For every frame, we update position by adding velocity. If the new position is out of bounds, we undo the movement.
This is the foundation of game movement. We can extend this with acceleration, friction, jumping, gravity, or any physics behavior we want.
22 - Box Collision Detection
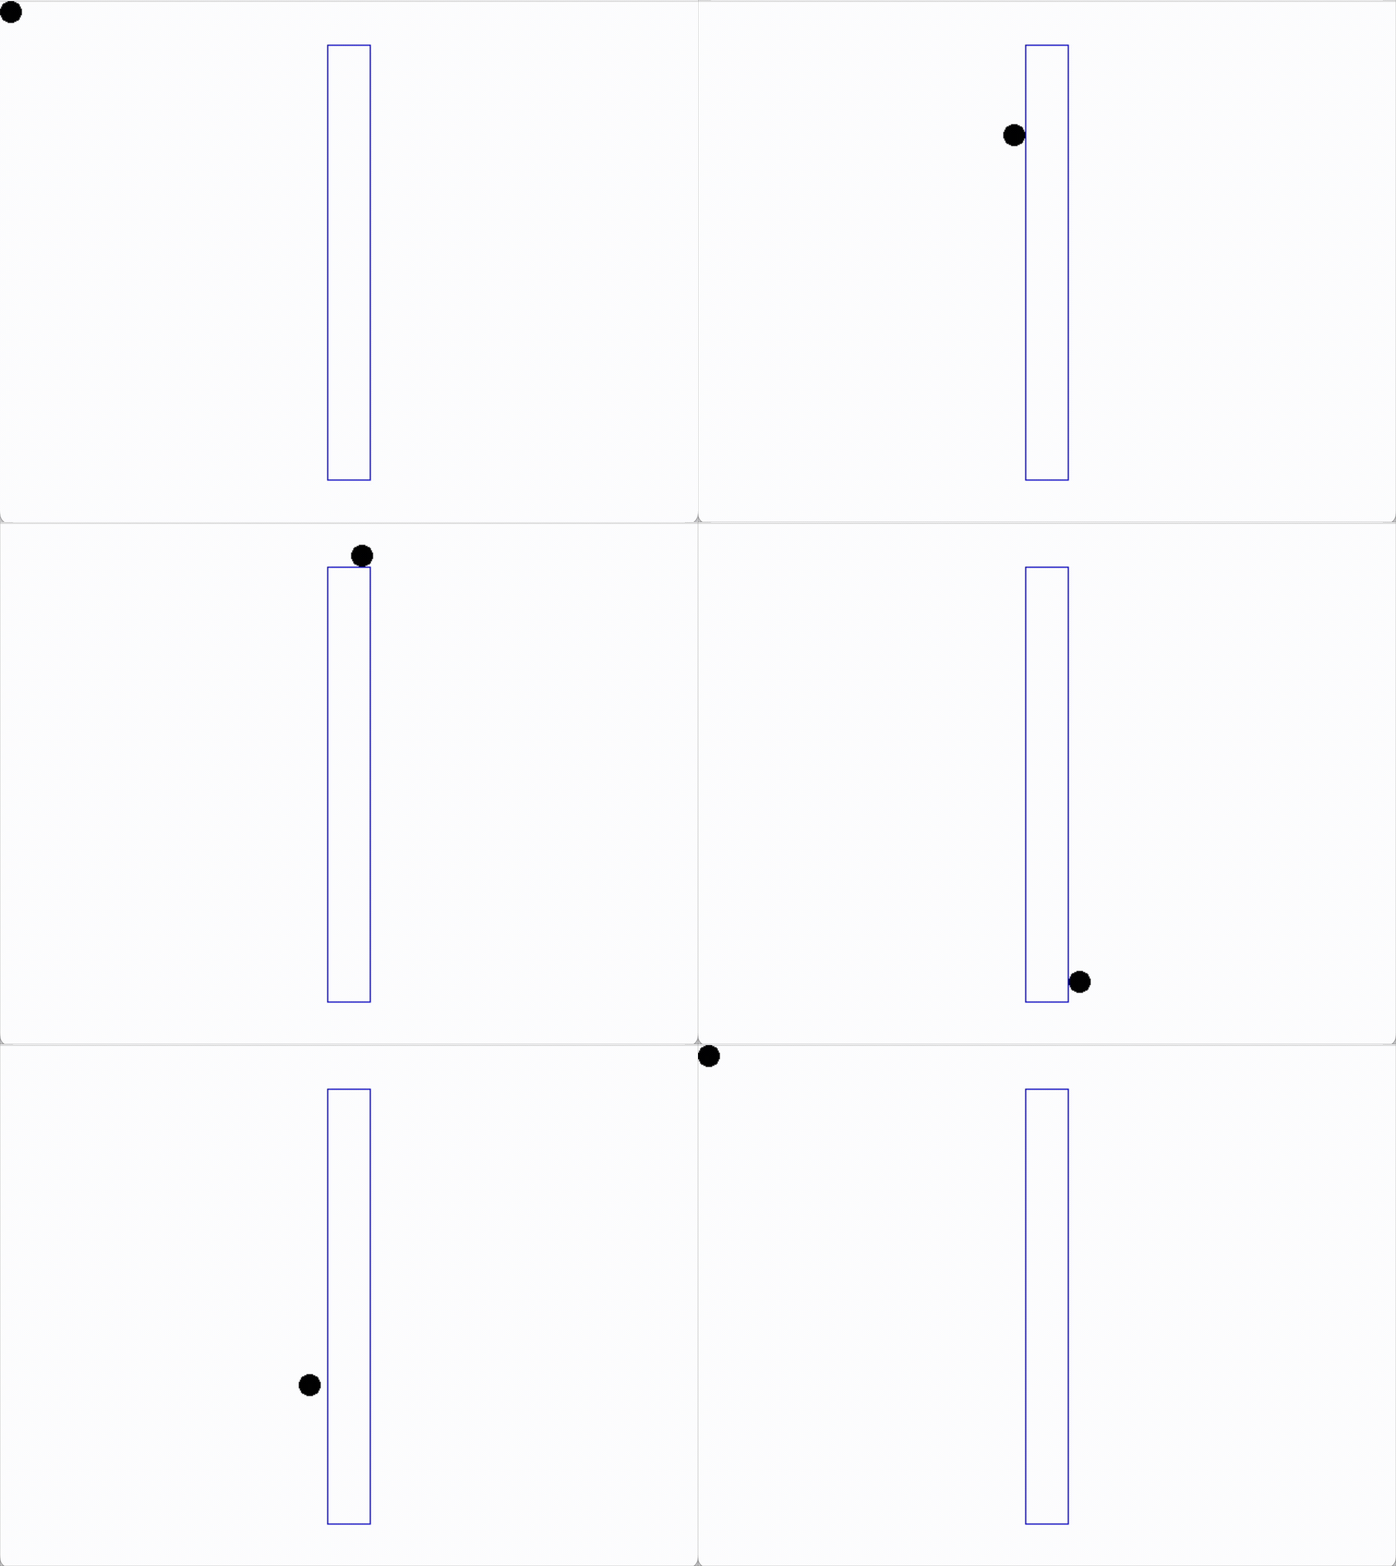
Before objects can bounce off each other, you need to detect when they touch. Box collision detection checks if two rectangles overlap. It's simple and fast.
Platformer games (checking if you land on a platform), shooter games (checking if bullets hit enemies), puzzle games (checking if pieces fit together), all use collision detection as a starting point.
The collision detection logic is simple: if two rectangles don't overlap horizontally OR vertically, they don't collide. We check for gaps on each axis. If there's a gap on either axis, no collision.
The code checks when rectangles DON'T collide (easier to think about), then returns the opposite. This technique is fast and reliable, used throughout 2D games.
Conclusion
Porting these tutorials from C++ to Rust was a great learning experience. It helped me understand game development fundamentals from the ground up.
There are more topics on LazyFoo like Camera and Scrolling, additional collision detection methods, texture streaming, etc. that I haven't ported yet, but they're equally important fundamentals worth exploring.
I hope this helps you on your own game development journey.
The complete source code is available on GitHub.
Happy coding! 🎮🦀